
Finding a parking boot clamped onto your tire can be a frustrating experience. Before resorting to drastic measures, consider removing it yourself. However, proceed with caution! Improper removal techniques can damage the boot or your tire, potentially leading to additional costs. This guide provides step-by-step instructions for safe and effective tire boot removal, along with important safety precautions to remember.
First, it is important to identify the type of boot on your car. There are two main types of boots: metal and plastic. Metal boots are typically used by law enforcement and are very difficult to remove without the proper tools. Plastic boots are commonly used by private companies and are easier to remove. Look for any visible signs of a tire boot on your vehicle, such as a hard metal clamp or a plastic device attached to one of your tires.
Next, you will need to gather the necessary tools for the job. You will need a tire boot removal tool, which can be purchased or rented from most auto parts stores. Additionally, you may need a hammer, pliers, and a lubricant such as WD-40. It is important to note that attempting to remove the boot without the proper tools can be dangerous and may cause damage to your tire or the boot itself.
Understanding the Boot and Its Locking Mechanism (Optional)
If you’ve ever found yourself with a boot on your car tire, you know that removing it can be a daunting task. But with a bit of knowledge and the right tools, you can get that boot off and be on your way. In this section, we’ll take a closer look at the different types of tire boots and their locking mechanisms.
Types of Tire Boots
There are two main types of tire boots: the wheel clamp and the boot on the lug nuts.
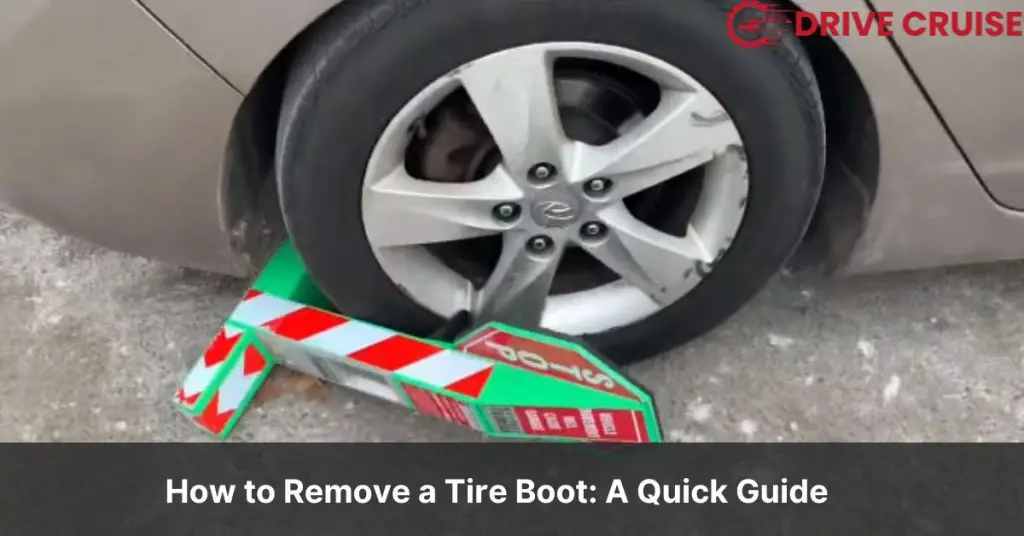
The wheel clamp, also known as a Denver boot, entirely encloses the outer rim of the tire, preventing the vehicle from rolling. This type of boot is commonly used by law enforcement agencies to immobilize vehicles with unpaid parking tickets or other violations.
The boot on the lug nuts is less frequent and secures around the lug nuts, preventing wheel removal. This type of boot is often used by private parking enforcement companies.
Locking Mechanism (General Information)
Most boots utilize a single or double-sided locking mechanism that requires a key for removal. Some boots might employ a combination lock system.
It’s important to note that tampering with a lawfully placed boot might be illegal in your jurisdiction. Always check with local authorities before attempting removal yourself. If the boot was placed in error, contact the booting company immediately with proof of ownership and registration.
Gathering the Necessary Tools (Avoid Damage!)
Before you start removing the tire boot, it is important to gather the necessary tools to avoid any damage to the boot or surrounding components. Here are the essential tools you will need for the job:
Essential Tools
- Owner’s Manual (for vehicle-specific lug nut torque specifications)
- Lug wrench (the one recommended by your vehicle’s manufacturer)
- Socket wrench set (to fit your lug nut size, if applicable)
- Flashlight (for better visibility under the wheel well)
- Optional: Rubber mallet (for gently tapping stubborn components loose, use with caution)
The owner’s manual will provide you with the specific torque specifications for your vehicle’s lug nuts. Make sure to follow these specifications to avoid any damage to your wheels or tires. The lug wrench and socket wrench set are essential for removing the lug nuts from the wheel.
A flashlight will help you to see better under the wheel well and locate the tire boot. A rubber mallet can be useful for gently tapping stubborn components loose, but use it with caution to avoid causing any damage.
Tools to Absolutely Avoid
There are some tools that you should absolutely avoid when removing the tire boot. These tools can cause damage to the boot or surrounding components, potentially causing further issues. Here are the tools to avoid:
- Screwdrivers (can damage the boot and surrounding components)
- Pliers (can scratch or bend the boot, potentially causing further issues)
- Cutting tools (can damage the boot and potentially violate local laws)
Using screwdrivers or pliers can cause damage to the boot or surrounding components, potentially causing further issues. Cutting tools can damage the boot and potentially violate local laws. It is important to use the right tools for the job to avoid any damage to your vehicle.
Removing the Boot Safely: A Step-by-Step Guide
Removing a tire boot from your car can be a frustrating experience, but with the right technique, you can get it done safely and efficiently. Here is a step-by-step guide to help you remove the boot safely.
Step 1: Park on a Level and Stable Surface
Before attempting to remove the boot, make sure you park your car on a level and stable surface. Engage the parking brake and chock the wheels opposite the booted tire for added safety.
Step 2: Loosen the Lug Nuts (if applicable)
Refer to your vehicle’s owner’s manual for the recommended lug nut tightening sequence and torque specifications. Loosen the lug nuts slightly, just enough to allow for slight wheel movement. Do not remove the lug nuts completely!
Step 3: Locate the Locking Mechanism (if possible)
Some boots might have an exposed locking mechanism that requires a key. If applicable, use the provided key to unlock the boot.
Step 4: Identify Release Points (if no key available)
Carefully inspect the boot for any visible release levers or mechanisms. If present, follow the specific instructions for releasing the boot.
Step 5: Gently Disengage the Boot (Use Caution!)
If there are no visible release mechanisms, avoid prying or forcing the boot open. This can damage the boot or your tire.
Limited technique tip: Some boots might have a locking arm that secures onto the rim. If you can safely access it (without causing damage), you might be able to gently tap the arm with a rubber mallet to loosen its grip, allowing for removal of the boot. However, proceed with extreme caution and only if absolutely necessary.
Step 6: Remove the Boot Completely and Retighten Lug Nuts (if loosened)
Once disengaged, carefully remove the boot. If you loosened the lug nuts in step 2, retighten them to the manufacturer’s recommended torque specifications using the lug wrench in the proper sequence. Double-check the tightness after driving a short distance.
Disclaimer: Specific removal procedures might vary depending on the boot type and locking mechanism. Consult the booting company or refer to their instructions if available for the most accurate steps. This guide provides a general approach.
With these steps, you can now remove a boot from your car safely and efficiently. Remember to always proceed with caution and follow the instructions carefully to avoid any damages to your car or the boot.
Important Safety Reminders
Removing a tire boot can be a frustrating and time-consuming process, but it’s important to prioritize safety above all else. Here are some important safety reminders to keep in mind before attempting to remove a tire boot:
- Never attempt to remove a boot if you suspect it was placed lawfully due to a parking violation. Contact the booting company or local authorities for proper removal.
- If the boot cannot be removed safely using the methods outlined in this article, seek assistance from a professional towing service or mechanic.
- Always prioritize safety. Avoid using excessive force or techniques that could damage your tire or the boot.
Before you begin removing the tire boot, make sure you have all the necessary tools and equipment on hand. This includes a lug wrench, jack, lubricant, and pry tool or flathead screwdriver. It’s also important to wear protective gloves and eyewear to prevent injury.
Conclusion
Removing a tire boot can be a frustrating experience, but it doesn’t have to be. With the right tools and approach, you can get the job done quickly and efficiently. Here are a few tips to keep in mind:
- Always start by deflating the tire. This will make it easier to remove the boot.
- Use a grinder or bolt cutters to cut through the boot if necessary. Be careful not to damage the tire or wheel.
- If you don’t have access to a grinder or bolt cutters, try using a straw to deflate the tire further. This can help loosen the boot.
- Remember to check the type of boot you have before attempting to remove it. Some boots may require a specific approach or tool.
By following these tips, you can remove a tire boot without damaging your vehicle or injuring yourself. Remember, if you are unsure about any step, consult a professional for assistance. With a little patience and the right tools, you can get back on the road in no time.
Related Posts:
- Ball Joint Delete Pros and Cons: Should You Consider Removing Your Ball Joints?
- How to Remove a Tire Boot: A Quick Guide
- Hyundai: Check Your Active Air Flap System Today!
- B2204 ECU Configuration Mismatch: How to Troubleshoot and Fix the Issue
- What Does PM Mean on a License Plate: Explained
- Key System Error: Troubleshooting Tips for Nissan Altima